The FURNACE, part 2, 3...and ongoing improvements.........rebuilding..etc.
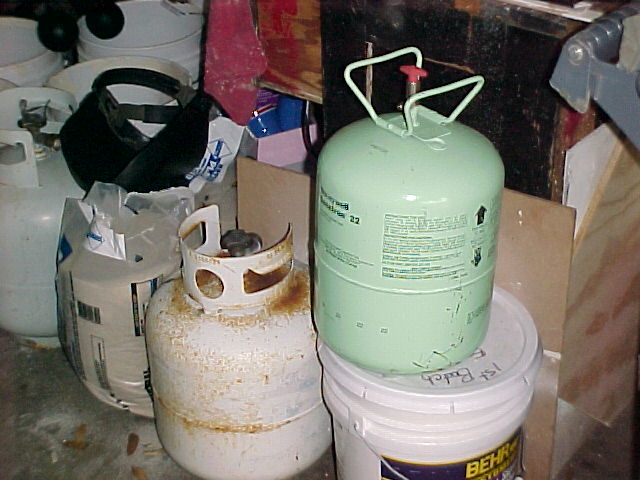
Let your buddies that work on air conditioning know you are making furnaces and you will soon have a ready supply of these 20lb freon tanks. I think they work great for a small bore furnace....and more. I've also been picking up a couple of old outdated propane tanks, the 20lb BBQ size. With any pressurized tank, freon or propane you must take extra, extra precautions before...BEFORE...you attempt to cut them open. First I open the valves and see if they bleed out anything, then with the valves open I tried to wrench the valves out of their fitting....dang, those valves are cranked down tight...if I can get the valve off I use the garden hose and fill the tank with water. This will push any residual gases out of the tank. Pour it out and it should be safe to cut. I use a 1/8inch cutoff wheel on my Ryobi grinder makes short order of cutting the tank skins.Wear your safety goggles. The freon tank valves seem to be welded on so I carefully drill a hole next to the valve and fill the tank with water there.

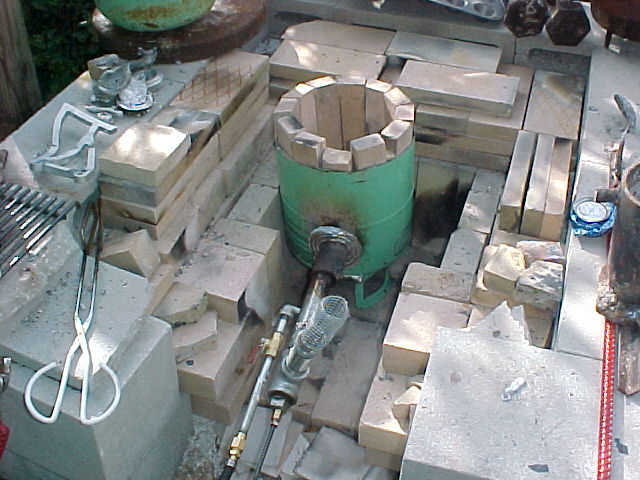
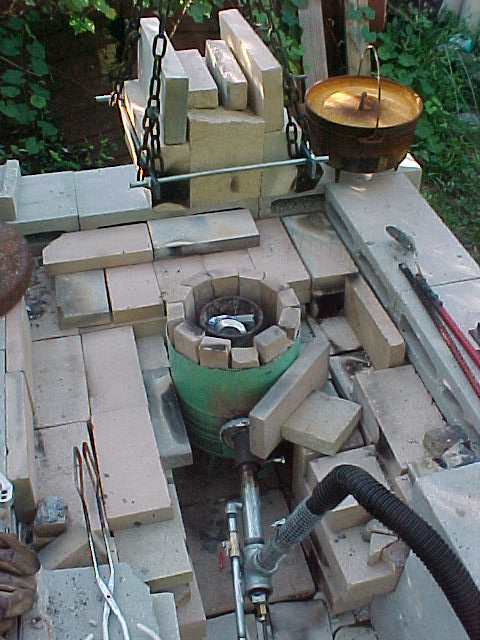
Since the original furnace/big firebrick oven was too big for me to heat efficiently and I figured out I can't productivly heat two or more crucibles at the same time I decided to use one of the free freon tanks I had and build a new furnace. Since I don't have a lot of extra money I decided not to buy any commercial refractory material for this go around. What I did have was a masonary saw blade that fit the skilsaw and pile of firebricks already paid for. I set the masonary blade at about a 30 degree angle and proceeded to saw a bunch of the firebricks lengthwise. I figured the angled cut would allow me to stack the firebrick on end and keyed together as I went around the freon tank. See the picture. Some of the firebricks cracked and broke but I saved the pieces and used them to fill in spaces. A Note: sawing firebricks with a skilsaw and masonary blade makes LOTS of brick dust. I sawed the bricks in front of my garage with a nice breeze...the nice breeze kept my work area clear but also blew all the brick dust over to the neighbors house. I don't think it impressed them. I put some sand into the curve of the tank bottom (which is the top because I flipped the tank to sit on its handles) and then put a firebrick piece on top. You can see that I cut the tuyere (twear) hole for the burner into the side and welded a short piece of 2in pipe in place. The freon tank steel is pretty wimpy so I kept blowing holes in it as I gorilla welded the pipe in place. The pipe insert has a bolt/nut rig welded in place which gives me a way to tighten down and support the burner tube which will enter the furnace here. I tired to mount the pipe so the burner enters along a side of the furnace interior nad swirls around the crucible....it sort of turned out that way. Since the welded pipe was so ugly I put a can bottom cut to fit around the pipe as a flame stop for flames that might poke out thru the holes!!
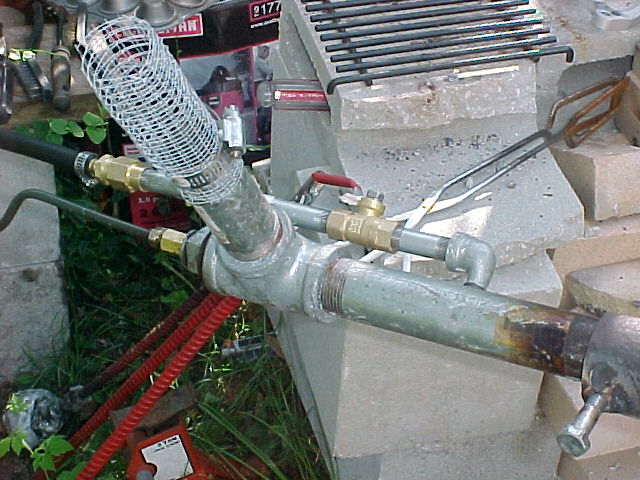
Above is my moya style propane and waste oil burner setup. You can read all about the Moya burner at the BYMC forums at: http://www.backyardmetalcasting.com
It consists of a piece of 1 x 8 inch pipe (I used galvanized pipe...search for 'black' pipe to avoid the zinc coating). It fits into a T fitting which has a 4 i.nch nipple and a nifty screen holder for my blower hose n( I used a Sears Craftmas shopvac set up to blow) I drilled a 3/8 hole into the 8 inch pipe and force fit a 90 degree fitting and ramn a piece of 1/4 galv. pipe into a ball valve. Out of the ball valve we receive the propane via a high pressure line. The ball valve is so I can shut the burner down without going to the main tank valve. Into the back of the T fitting I made a pipe plug fitting into a holder for a oil line I made from some steel brakeline. The brakeline also has a valve to adjust the oil flow. To get some pressure on the oil line I used a plastic jug and some vinyl hose to lift the oil tankup in the air above the furnace and let gravity provide a little push.
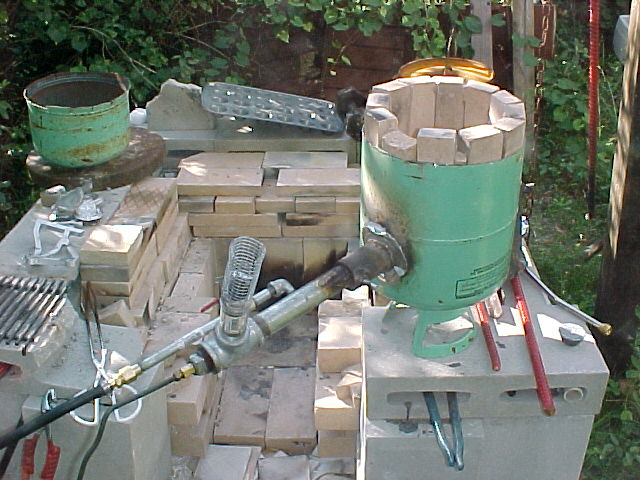
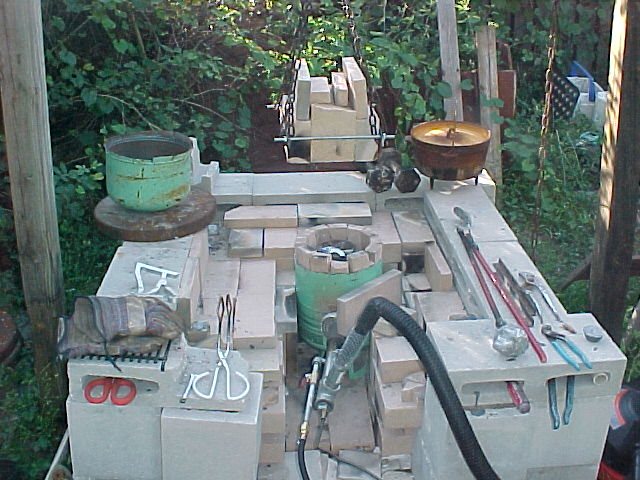
Here is the new furnace ready to set into my fireplace area. You can see the oil lines and propane lines and how the burner sits in the pipe I welded to the freon tank. In the back you can see another freon tank that I cut in half to make a dross catch pail...I mistakenly plopped some dross on the concrete blocks which immediately spalled and cracked apart so a suitable dross catcher is a big help. The holes in the blocks give some nice hidey holes to stash some tools I use alot.
Now the furnace is set into the fireplace and ready for a melt.
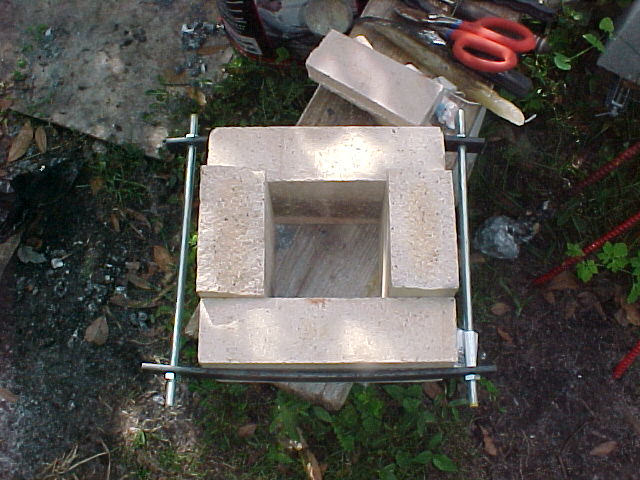
To create a top for the freon furnace I clamped some firebricks between some pieces of steel stock and some allthread leaving a 4x4 inch hole in the middle which I can feed cans and other scrap into the crucible sitting in then hot furnace.
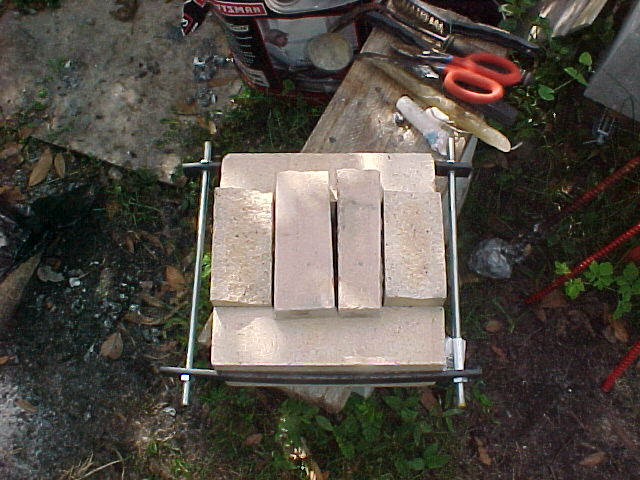
And to close up the top and hold heat I simply place some firebrick bits over the whole still allowing the exhaust to exit.
I mounted the firebrick to to my counterweighted gimble so I can raise and lower it with one hand. I also stacked extra firebricks around the freon tank to support it and possibly help hold more heat. Its still fairly inefficient but much better then the gigantic space I was trying to heat previously.
Lights, camera, action...its time for the first heat...some scrap and a few cans are ready in the furnace so now we can light it up........
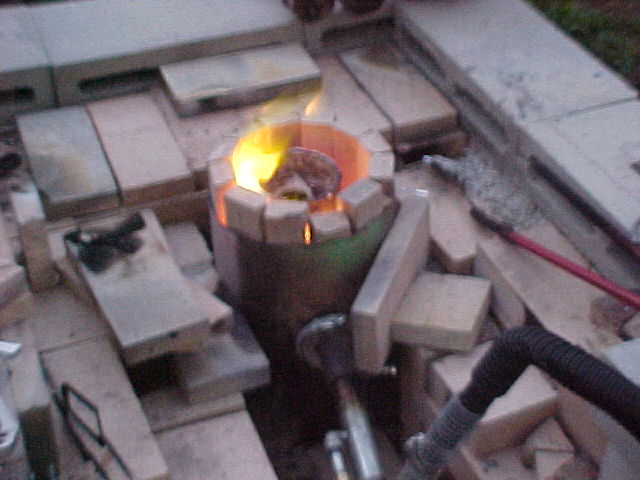
First heat of the new furnace....it can heat up and have a first melt in about 25 minutes form cold. You can see the shopvac blower hose in place on the burner setup in this picture.
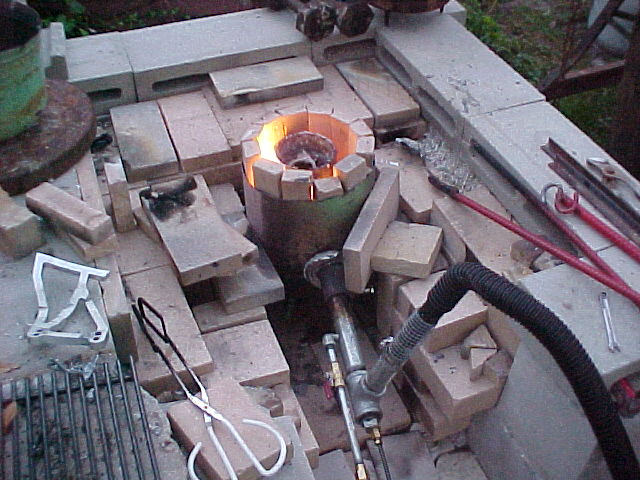
It didn't take me too long to stop using the gimble top and just place a coupkle whole firebricks on top of the furnace...faster and easier.
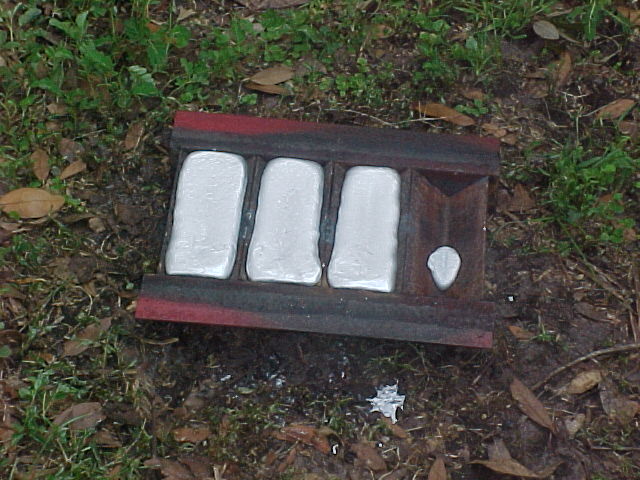
My first recycled aluminum ingots cast with the new freon tank furnace. I get about 4 lbs of aluminum in a crucible which is about 120 aluminum cans minus the dross I scoop off. Thats the ingot mold I made from some 2 inch angle iron. Beware the mold is HOT for quite some time.
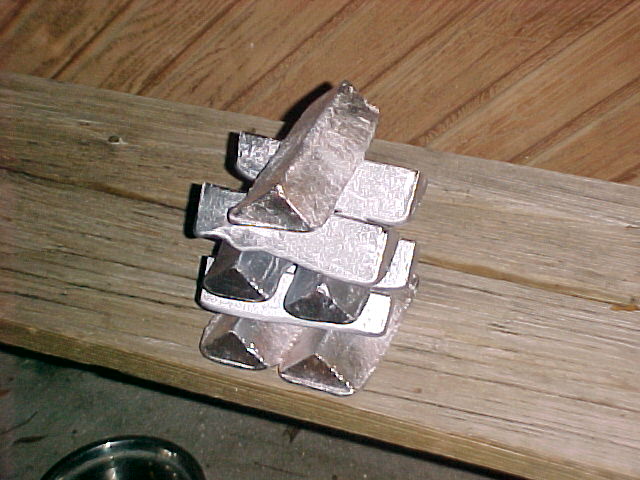
Todays stack o ingots all sitting pretty...I will consider this a success and can keep reducing that huge pile of cans I have out back....thus keeping my wife happier!

